So I am constantly being asked about a sticky shutter repair on the Canonet. Well, I had written one up ages ago, but it has been lost in the ages..
So I'm going to re-write one. I have all the original images I took when doing the repair, so they are a little outdated, but should work all the same..
BEFORE PROCEEDING WITH THIS REPAIR;
1) Are you capable of completing it from start to finish?
2) Do you feel confident?
3) Do you have all the required tools and materials?
4) Are you okay with the idea that you can potentially render your camera completely inoperative?
If so, feel free to continue. If not, send it in to a professional for service.
ANY AND ALL STEPS BELOW ARE COMPLETED AT YOUR OWN RISK!
I will take absolutely NO responsibility for any damage you have caused to your camera, through impatience, or inability, or incompetence.
Do not send me a message complaining on how my tutorial caused you to break your camera. This information is for educational purposes only, and cannot guarantee any results.
Should you ruin your camera, it is your fault, and solely your fault.
Continuing herein you have automatically agreed that I shall not be held responsible for any damages that come to your property, or your mental state.
Okay.. so that's all taken care of... Now lets continue...
First off, the things you will need are simple.
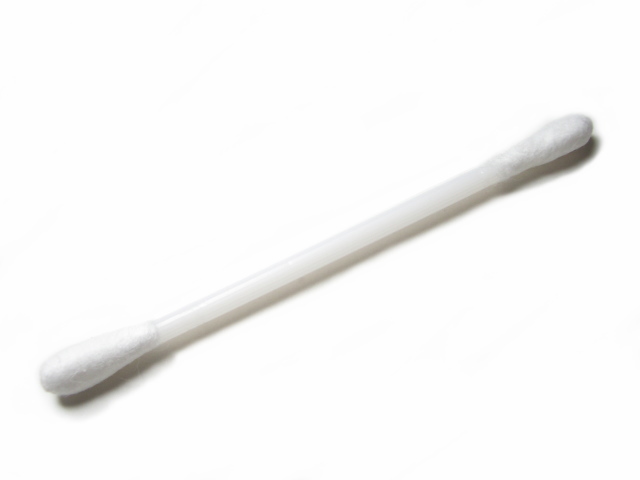
You will need a bunch of these. Known as Cotton Swabs, or Q-Tips. It doesn't matter what kind you have, they will all do the trick. Plastic shaft, or cardboard shaft, again, makes no difference.
If you live in a place that has a Green-Bin program, get the cardboard shaft as they can all go in there. The plastic shaft one ends up going in the garbage. Unless you pull the cotton off for the green bin and throw the shaft into the blue-bin.
Anyway, the next thing you'll need is a good work surface.
A table is a decent place, and you definitely need a good work light!
A goose-neck type desk lamp aren't a bad option, but I use a flashlight for the majority of my light.


For a work light, I have this, which is an LED light source, and is very bright and portable.
It is unobtrusive, and I can angle the beam where I need it most.
Plus, being a flash light, it is great for power-outs and working in dark places, but that's a different subject entirely.
Using a Gooseneck worklight isn't a bad idea either, as you can get one that clips to the edge of your table and can be angled into the right spot as well.
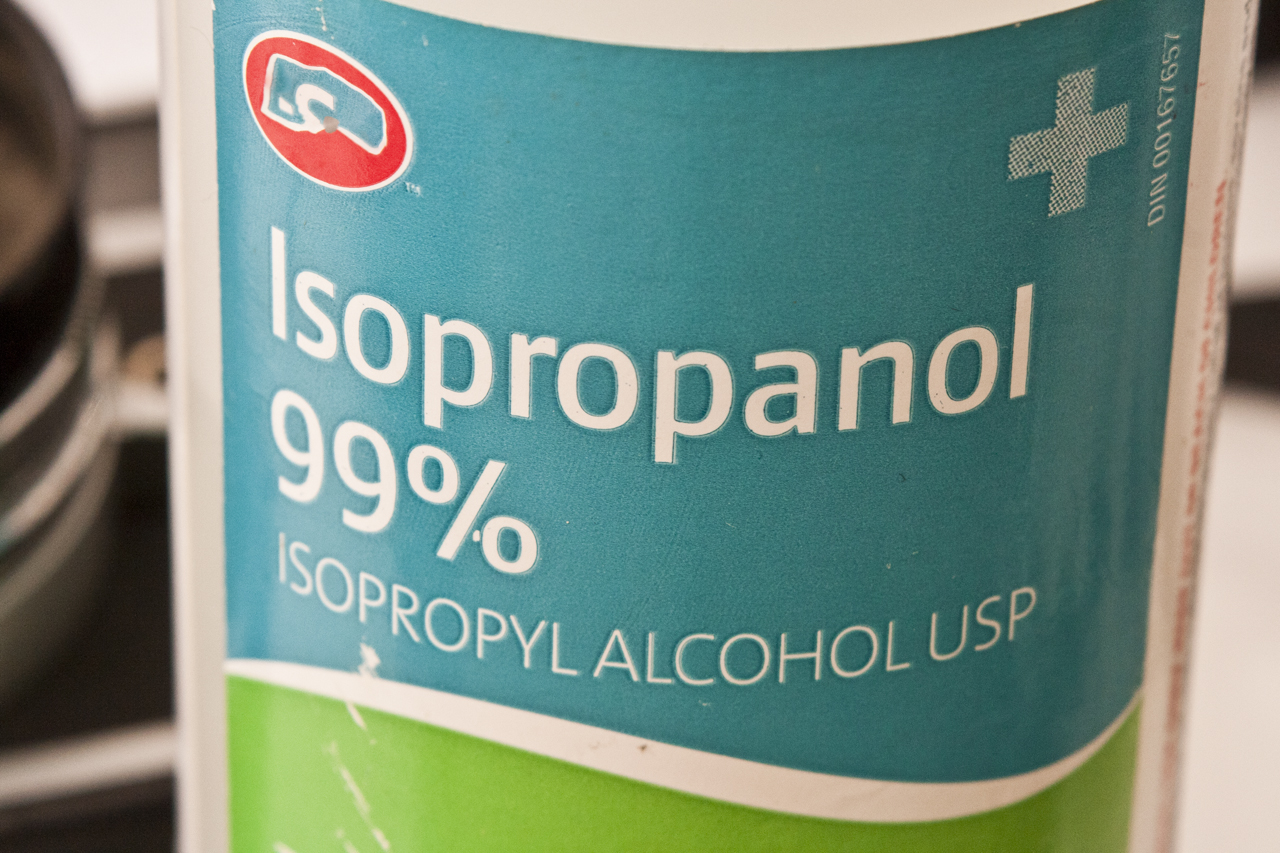
I prefer the flashlight as I can move it around the table where I need it most, and don't have to have it in a single spot. The other thing you will need is Isopropyl Alcohol 96% or higher. I have 99%
The reason for this is that it has a very low boiling point. I know that sounds odd. Boiling point? Water's boiling point is 100°C. What that means is that when water hits that temperature it is converted from a liquid into a gas and evaporates. Isopropanol does the same thing at a much much lower temperature. Place a drop onto a piece of paper and it will vanish before your eyes! This is it evaporating into the air, because of the low temperature boiling point.
But enough of the science lesson, and on to the repair!
Okay, we have our work surface, we have our light and the alcohol.. what else?
Oh yes, a screwdriver (fine jewelers drivers are best, or some electronics screwdrivers) and a spanner tool!
NOTE: Have a microfiber cloth (clean) or towel, or a soft pillow or silk handy.
I'm forgetting something...
....
OH of course! A CANONET!

Here we have a Canonet QL25, which is essentially a Canonet QL17 and a QL19 but with the slower ƒ/2.5 lens instead. Just because it is slower, doesn't make it any less usable. In fact, this camera has a very sharp lens!
But how would I know? The shutter is sticky! Well, it was, but I have fixed it a long time ago, and now I'm writing up the blog to show the repair.
First step is to locate the retaining ring notches on the front of the lens.
This is where you place the edges of your spanner tool and unscrew it from the camera.
You can, if you are very careful, use a small flat screwdriver, but I would not advise it.
If you don't have a spanner tool,
STOP. Get one before continuing any further!
This is the ring that is holding on the front embellishment. Place it off to the side for safe keeping.
As you notice I am working, again, on a white work surface. This makes it a much higher contrast area so I can see better. By having a white surface you can see all the screws and any clips you remove from the camera.
Always a good idea to have a dish or a tray of some sort for the different screws.
Also, make sure you have your phone, or a digital camera of some sort, with you during the process. Take pictures for YOUR REFERENCE! Just because you see it here, doesn't mean you will remember on YOUR camera!
The ring has been removed here, and the embellishment is now ready to be removed. What is nice is that the light meter sensor is not attached to this part, it's located further in the lens. Unlike the Konica Auto S2 which has the light meter in the front embellishment, and a couple of wires that gets in the way, the Canonet does not.
Smart thinking Canon!
Here the front embellishment is gone and you can now see the light metering density hole die. This die does not need to be removed, and can be left in place for the remaining of the repair.
The easy part is now complete!
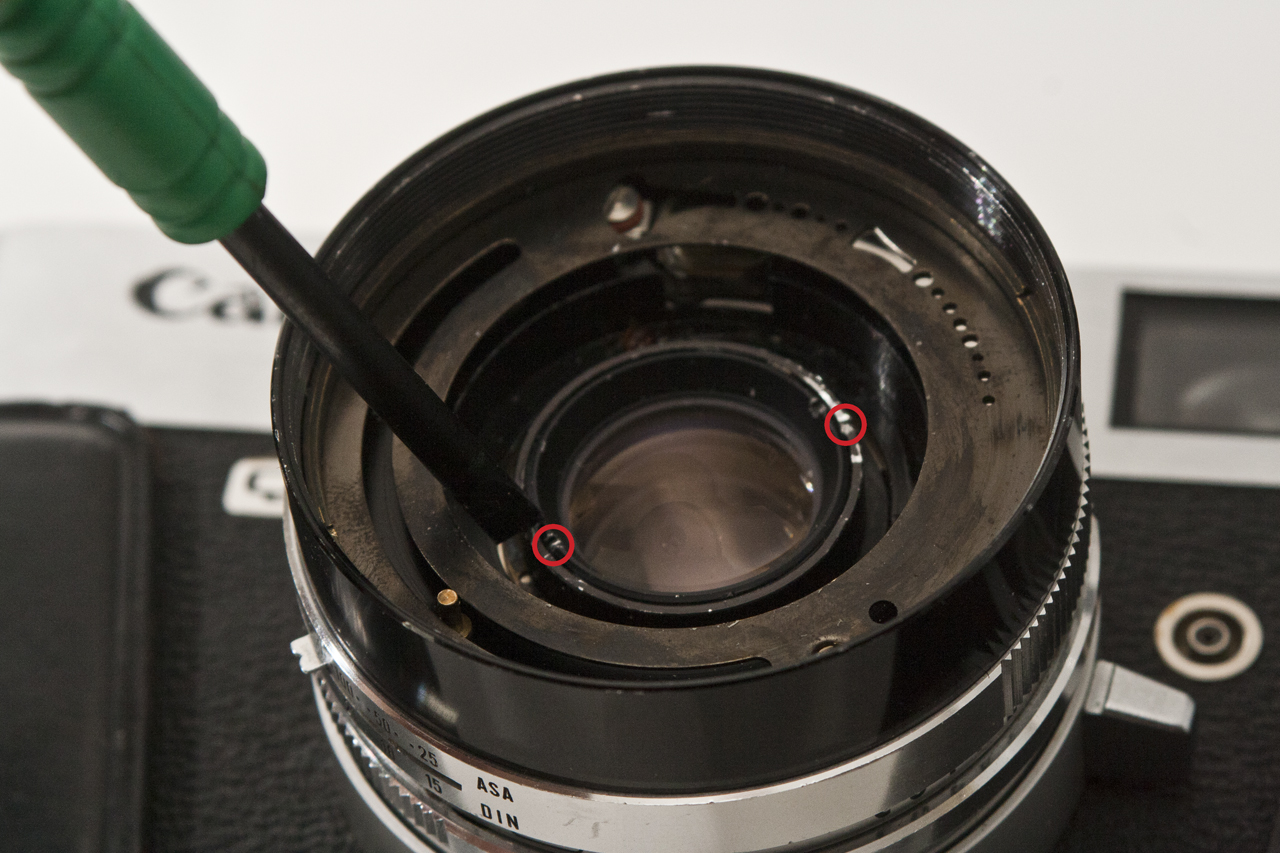
Next is the first element group. This has two notch marks in the housing for removal with your spanner tool. I do hope you have the adjustable kind, otherwise you'll be hard pressed with this repair!
I've circled the notches in red for easy identification on your camera.
Clearly this isn't the first time my camera has been pulled apart, seeing the scuff marks in the black paint on the ring.
I have a screwdriver in the image just pointing to the notch marks, I have an adjustable spanner.
There, first group is removed. CAREFULLY set this aside! In fact, if you have a microfiber pillow or cloth, clean of course, or some kind of silk fabric, put the glass in there. Be very very careful NOT to scratch the glass and do place it on a hard surface.
Oh and for a side note, since you have this out, if you have hazy glass, the Isopropanol is great! Using a Q-Tip dipped in the alcohol, gently clean it in small soft swirls. Use a dry q-tip to dry the excess and when its dry, use another clean and dry one to polish it in gentle swirls. Look through it at a light source, and it should look crystal clear. If you still see haze, repeat until its gone.
But be gentle!
Now that the element is set aside it should look like this.
What you are seeing is the shutter blades. Good chance there is some residual oil on those blades causing the shutter to stick shut. This part is a little tricky, but not hard to get passed. It's the removal of the rear element group so that we can access the back of the blades for a proper cleaning.
*NOTE: You can use NAPTHA for the shutter blade cleaning as well, for similar reasons as the Isopropyl. It is a pure liquid, no water content, and has a low boiling point so the chemical will evaporate quickly leaving no residue.
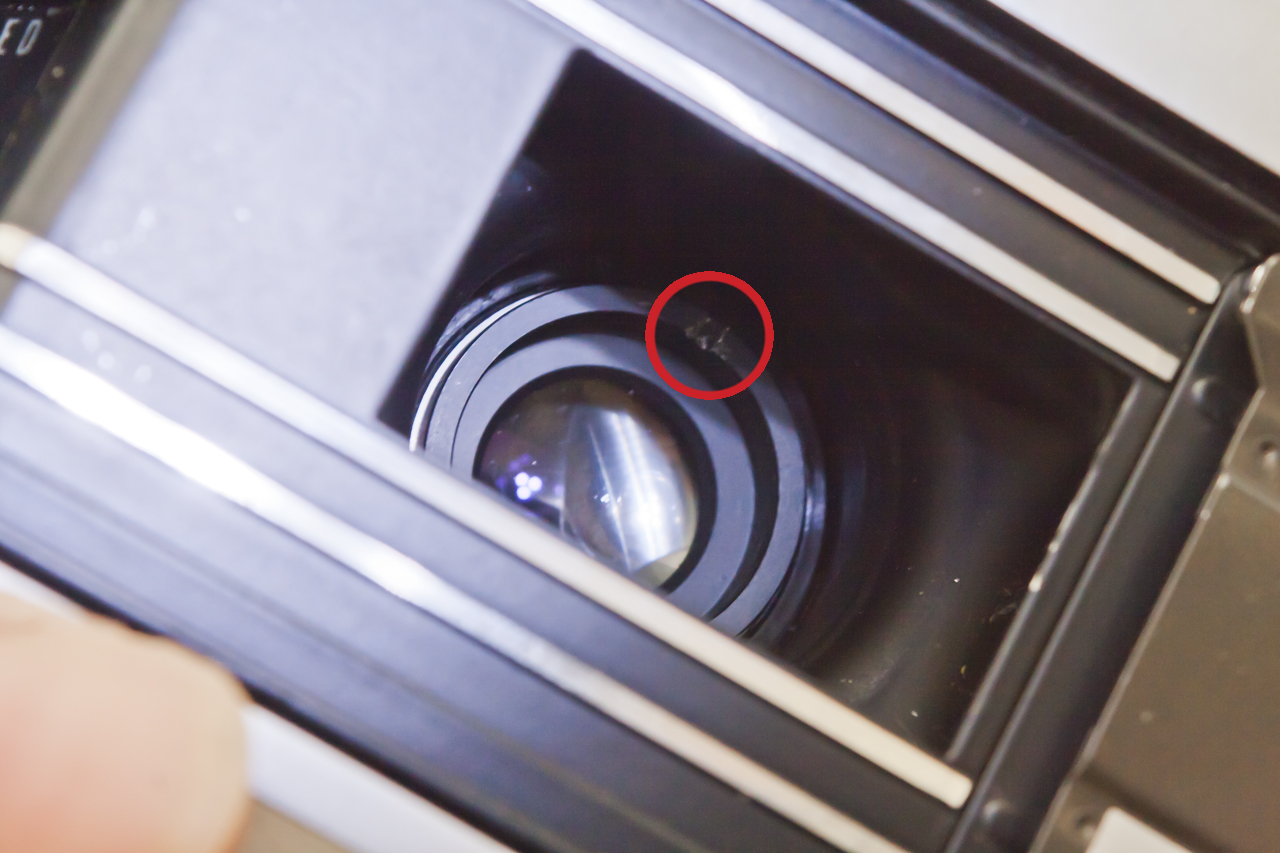
Outlined in red, in the photo not on the camera, is another retaining notch. There are two notches, directly opposite each other on the ring. Using your spanner tool, unscrew it gently. It might be stiff, considering it has been on there for quite a while, but will come off all the same.
Once it is out, place the glass element again with the front group. NOTE THE WAY IT HAS COME OUT OF THE CAMERA!!!
It is imperative that it goes in the exact same way it came out.
So here it is, the back of the shutter blades. Right now we are currently at the point where we need to stop, and reflect.
We have removed all the elements from the camera, and prepped to get the blades unstuck.
Well, lets have a quick break to calm our nerves. Don't forget, up to this point, we can always stop and put it all back together, no harm done. The shutter is a very sensitive instrument, designed with very little tolerances. Usually if something happens, even small, the shutter will fail.
So, stop, have a smoke, a breather, a cup of coffee or tea.
Go for a quick walk, or grab some fresh air.
Okay, we're back. Hope you're feeling much more relaxed.
So, since you're continuing to read, it means one of two things, you're going to precede with the repair or you are just reviewing this post to see if it is right for you.
Either that, or the dancing Hot-Dog enticed you to continue.
Alright, so now that you're back, we need to get outselves a shutter release cable. One that has a lock on it.
Once it is screwed in place, you need to set the shutter speed dial to "B" and the aperture to its widest setting, which for this model is 2.5
As you can see, I've tried actuating the shutter a few times to try to free the shutter without opening the lens up prior to the next part.
So lets do that now...
Speed dial...
Yup, now set to "B"... Ooops, I didn't set the aperture to the 2.5! Silly me, but that's okay, I'll fix it before I start the next part.
Okay, so making sure the shutter and aperture is set, I now cock the shutter by winding on the film advance.
So with the shutter cocked, and if the winder won't advance you've got it cocked already, we will now depress the shutter release cable release and lock it in its depressed position. As you can see in the image I have the shutter release in the depressed and locked position, but nothing happened to the shutter. Stuck closed!
DARN!
So the next part I could not photograph as I was trying to get the blades open gently so I will describe it.
Using a cotton swab dipped in alcohol, gently massage it onto the blades, front and back, and let it sit for a few minutes. You can also spray Naptha onto the blades and let it sit as well.
Once it has sat for a few minutes, if it hasn't opened, use the swab, a dry one, and start to clean up the blades. Gently.
While doing that, get to a point on the blades where you can start to push them open a little.
This should be done at the front of the camera
I am again using my screwdriver to point at the shutter blades. As you can see there is one blade that overlaps the rest. This is a good starting point. But do it gently, and in the general direction that the blades will rotate open in.
Once they start to move they will snap open...
Which is exactly what has happened here. Looking through the back of the camera, the shutter is completely open. Release the shutter, and recock it.
Test it and see if it will open again. If not, using the same technique, clean it again.
It should open up almost instantly afterward.
Once that is done, you should continue to use the alcohol and clean the residual oil from the blades.
Test it again once it is cleaned, and if it is snapping open and closed each time no problem, change the shutter speed to 1/60s. You should actuate the shutter 5 to 10 times, and continue to clean the blades.
Again, another 5 to 10 times, and repeat.
When you no longer see any residue on the blades.
*NOTE: When cleaning the blades, afterward, only use a very small amount of Iso-Alcohol for the first 4 or 5 cleaning cycles, AND ALWAYS DRY OFF THE EXCESS BEFORE ACTUATING THE SHUTTER!
The blades MUST be clear and dry before you actuate the shutter.
There will be some under the blades, that is unavoidable, which is why in between each clean you actuate the shutter 5 to 10 times. This will rub it out from under the blades, and it will evaporate.
Any "liquid" that doesn't evaporate is oil on the blades, and must be cleaned off. That is why you use Alcohol or Naptha.
You can also use this exact same technique on the aperture blades to clean any oil off them, if there is any oil.
If there isn't, leave them alone. Like the shutter, they are built with very little tolerances for error.
Reassembly, start with the rear element group first.
Pop it into the camera, and screw it in by hand gently at first.
Then SNUG IT only using your spanner tool. Do not over-tighten. Doing that and you can damage the camera.
Also, if the lens is hazy, as above steps for front element group, you can clean the glass the same way.
Next, we flip over the camera and reinsert the front element group.
Hand tighten it only. Once it is tight by hand, use your spanner tool and snug it.
Once that is done, we'll pop in the embellishment..
Retaining ring time next, so screw that back in by hand until it is finger tight, and use the spanner tool to snug it up.
There we go!
The camera is now reassembled...
Time for a field test...
So, load it up with your favorite film, and give it a good test...


Looks to me like the operation was a success!
Give yourself a pat on the back, and relax your nerves. That's a great job, and well done!
Don't get cocky, though. This was a relatively simple fix. If it gets more involved, such as timings being off on the shutter speeds, or a blade sticking closed, that is when the camera requires a professional service.
A sticky shutter is one thing, but anything major requires the pros to repair it!
Always send your cameras in for a CLA once every 10 years. They will benefit from a bit of TLC. Just because the camera is working now, doesn't mean that it can't fail at the worst possible moment.
Enjoy the camera, it will serve you well for many more years to come!
All above photos taken with this camera were shot on Ilford FP4+ 125 ASA film
Left Image: Canon EOS 40D dSLR w/Helios 44/2 58mm ƒ/2 Lens
I hope you enjoyed reading this post, and that it was informative and useful. I enjoy doing this sort of stuff. But if the camera problem is more difficult to overcome, or the camera is far more complicated than this, I won't touch it and send it to the professionals.
Until next time fellow bloggers, keep those shutters firing!